Mitered corners, Y seam, spool block I just love spool blocks
I cut 2 inch wide strips for this spool and a 2 inch center square.
Using leftovers from previous project. Use the Companion Angle (CA) designed by Darlene Zimmerman to cut the spool ends and background pieces.
Cutting both strips at once here
For a 2 inch center square line up the strip with the top dotted line on the CA and cut, flip over and cut another.
The five pieces of the block
the short edge of the spool ends and background pieces are a tiny bit shorter than the center square but it works better that way.

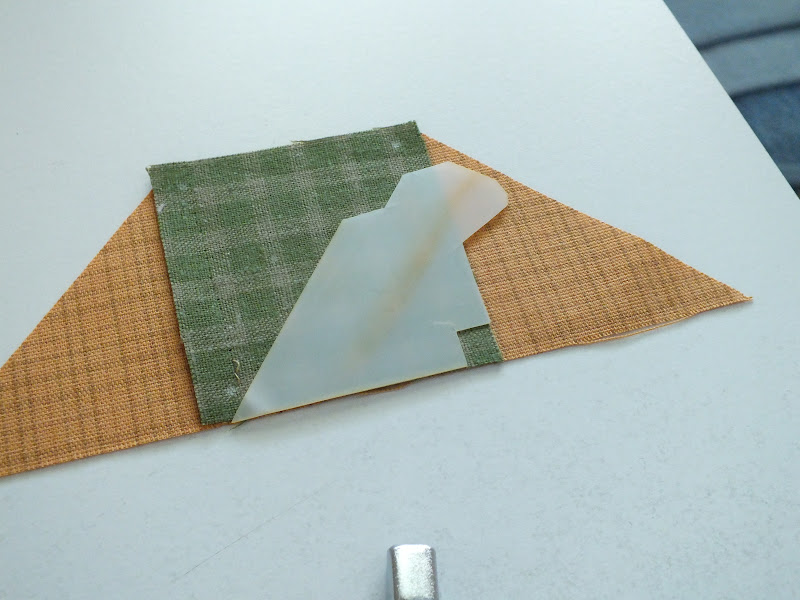
Mark a 1/4 inch seam for each corner. I made a template from template plastic with a 1/4 inch square cut out.
other angles don't mean anything for this block Center the square on the background fabric
and sew from dot to dot
1/4 inch mark to 1/4 inch mark
sewing second piece to the center square
sew background, sew spool fabric, sew background then spool fabric 1,2,3,4
sewing the last piece to the center square
It looks like a spool sorta but it will background fabrics across from each other and spool ends across from each other so far so good even though they are getting in each other space right now. ha ha
Fold square in half diagonally from the corner of the square, match edges carefully.
Very important to match edges and fold in half and finger crease.
Sew from stitching line 1/4 inch seam
first seam so good so far whew............ wipe brow and on to the next.
Fold center square exactly in half again match up diagonal edges and sew from the seam to the edge.
We are on a roll here repeat with the last 2 corners you will be an expert by the 4th corner.
Drum roll please there should be an X in the center of the spool
back side pretty messy
but its the back side
Press
I like to press the background over the spool fabric so the spool stands out a little and the square flat.
front side
trim all the dog ears
and sew a bunch more.
Happy sewing spools,
Ann


 Mark a 1/4 inch seam for each corner. I made a template from template plastic with a 1/4 inch square cut out. other angles don't mean anything for this block Center the square on the background fabric


4 comments:
Brilliant, Ann! I'd like to give this a try. What angle does the ruler cut the triangles at? I have trouble getting specialty rulers but may be able to find/do something similar.
Thanks for this you make it look very straight forward.PS Like the trick with the 1/4 inch cut out of the template.
The companion angle cuts a 90 degree angle. Original use was to cut the large triangle for a goose unit and to be used with the easy angle which cuts a 45 degree angle for a half square triangle and the side of the goose unit. The companion angle is also great for cutting triangles for a quarter square triangle from a strip of fabric. Ann
The companion angle cuts a 90 degree and a 45 degree angle
Ann
Excellent tutorial. Very good illustrative photos.
Post a Comment